Opening a new contract for a reservation, walk-in, or corporate account is a straightforward process, while still offering flexibility for adjustments throughout. This article walks through a high-level checkout flow for an existing reservation.
Start the Checkout Process
1. Launch Checkout
On the Rental Search page, locate the reservation and select Check Out to begin the checkout process.

2. Confirm Checkout
You will be prompted to confirm that you want to start checking out this reservation. Select Yes to proceed.

Review Reservation Details
3. Review Reservation Information
The first screen displays all reservation details, including:
- Dates and times
- Assigned vehicle
- Review the information, then click Next.

Insurance & Coverage
4. Add or Verify Coverage
If the renter has no insurance or is purchasing coverage, add coverage here.
If the renter is using their own insurance, select the green coverage button and upload the policy information.


5. Continue
After adding or confirming coverage, click Next.
Personal Information
6. Review Primary Driver
The primary driver from the reservation will already be listed. Open the driver profile to review their details.
7. Edit Driver Information (If Needed)
Correct any incorrect information:
- Click Save if changes are made


8. Add Additional Drivers
Select Add Driver to include additional drivers on the contract.

9. Enter Additional Driver Details
Search for an existing renter or manually enter the new driver’s information, then click Save.

10. Add a Local Contact (Optional)
If needed, click Add Local Contact to collect emergency contact information.

11. Additional Attributes
The additional attributes section is customizable by brand to add any additional needed information
- A hotel
- An Airbnb host
- A local friend or relative
- Airline information

12. Continue
Once all drivers and contact information are added, click Next.
Vehicle Assignment & Extras
13. Assign a Vehicle
Select a vehicle from those available at the location. You can:
- Change the car class if needed
- View vehicle status (serviced, upcoming maintenance, overdue)
- Expand the dropdown for additional vehicle details

14. Update selected fleet and add Prepaid Fuel (Optional)
If the customer wants prepaid fuel, add it during this step.

15. Continue
After assigning the vehicle, click Next.
Payments & Deposits
16. Add a Payment
Click the plus (+) icon to add a payment.

17. Select Payment Method
Choose how to process the payment:
- Terminal device (in-person payment)
- Existing card on file (tokenized)
- Manual keyed entry
- External Payments (Non-integrated payments)

18. Set Payment Amount
Adjust the amount by changing the Type dropdown. Default options are based on company settings.

19. Choose Transaction Type
Select whether the transaction is:
- An Authorization
- A Sale

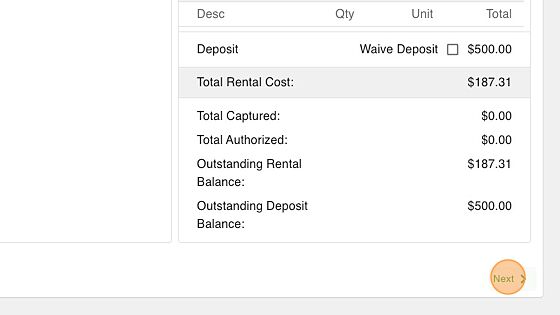
20. Collect Deposit (Authorization Example)
In this example, the deposit is collected as an authorization. After clicking Save, the customer will follow the prompts on the terminal.

21. Collect Remaining Balance
Click Create again to collect the remaining balance as a sale.

22. Use Existing Card
Since the card was just captured, select Use Existing Card.

23. Process Sale
Select the card and click Save to charge the remaining balance.

24. Confirm Payment Completion
Verify that:
- Outstanding rental balance = 0
- Outstanding deposit balance = 0
- This confirms all required payments have been collected.

25. Continue
Click Next to proceed.
Signature & Final Confirmation
26. Collect Customer Signature
The platform offers multiple signature options:
- Download the contract for signature
- Email the contract to the renter
- QR code that the customer can scan
- Open the contract in a new tab

27. Confirm & Assign
Once the contract is signed, click Confirm and Assign to mark the contract and vehicle as On Rent.

28. Final Confirmation
You will receive a final prompt. Select Yes to finish opening the contract.
